The Apache HTTP server is a mighty beast that powers the majority of websites. It has evolved into a complex server that slices, dices, dances, and sings. It powers vast hosting centers, and it is also splendid for running small personal sites.
The trick with Apache is knowing which configurations you need as it has plenty to choose from. We’ll start with setting up a single site, and then in part 2 set up SSL, which is vitally important, and we’ll learn a bit about the .htaccess file. Yes, .htaccess, that wonderful file that allows us to make per-directory configurations, but which uses such a contorted syntax it reduces the most stoic server admin to tears and whimpers. The good news is you never need to use .htaccess if you have access to your Apache configuration files. But when you don’t, for example on shared hosting, you need .htaccess.
In this series we’ll tackle Debian/Ubuntu/Mint and Fedora/CentOS/Red Hat separately, because the various Linux families are all special flowers that feel they must organize the Apache configuration files in their own unique ways.
On Debian/etc. install Apache with this command:
$ sudo apt-get install apache2
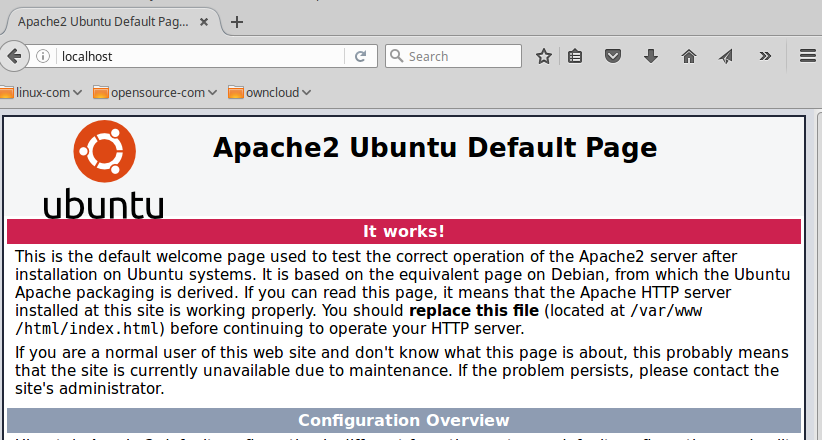
This installs Apache, utilities, configuration files, and other items you can see with apt-cache show apache2. Debian/Ubuntu start Apache automatically after installation. Point your web browser to http://localhost to verify that it’s running; you should see the default index page (Figure 1).

Where is Everything
Configuring Apache appears complex at first, but when you study the configuration files you see a nice modular scheme that makes it easy to manage your configurations. The configuration files are in /etc/apache2. Spend some time studying your configuration file structure and reading the default configuration files. You should have these files and directories:
apache2.conf
conf-available
conf-enabled
envvars
magic
mods-available
mods-enabled
ports.conf
sites-available
sites-enabled
The main server configuration file is /etc/apache2/apache2.conf. You won’t spend much time editing this file as it ships with a complete configuration, and it calls other configuration files for the bits you need to customize. Look in here to see the location of server configuration files, your HTTP user and group, included files, log file locations, and other global server configurations.
conf-available contains additional server configurations. Keep any additional global configurations in this directory, rather than adding them to apache2.conf.
mods-available contains configurations for all installed modules.
sites-available contains configurations for your virtual hosts. Even if you’re running only a single site you will set it up in a virtual host configuration.
None of the configurations in these directories are active until they are symlinked to their respective *-enabled directories. You must use Apache commands to set up new sites correctly, which we will get to in the next section.
envvars contains Apache’s environment variables.
magic has file MIME types, so that Apache can quickly determine the file type from its first few bytes.
ports configures the TCP ports that Apache listens to.
Single Site
The installation comes with a default site that is configured in sites-available/000.default.conf. You could modify and use this, but it’s better to leave it alone because it’s a useful testing tool. Let’s be like real nerds and make our new site from scratch. First create its document root (which in this example is test.com), enter the new directory, then create and test your sample index page:
$ sudo mkdir -p /var/www/test.com
$ cd /var/www/test.com
$ sudo nano index.html
Feel free to copy this for your new test page. It must be named index.html and go in your document root:
<head>
<title>Test.com index page</title>
</head>
<h1>Hello, welcome to test.com! It works!</h1>
<h2>That is all I have to say. If you don't see this then it doesn't work.</h2>
</body>
</html>
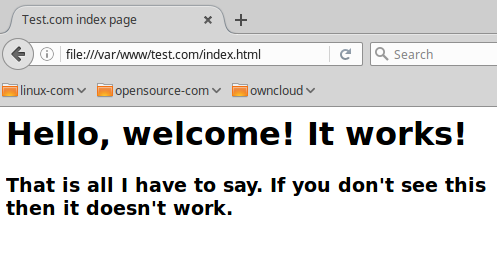
Test your new index page by opening it in a web browser (Figure 2), which in this example is file:///var/www/test.com/index.html.

.conf extension, because this is how they are defined in apache2.conf.
$ cd /etc/apache2/sites-available/
$ sudo nano test.com.conf
Copy this example configuration, substituting your own email address:
<VirtualHost *:80>
    ServerAdmin carla@localhost
    DocumentRoot /var/www/test.com
    ServerName test.com
    ServerAlias www.test.com
    ErrorLog ${APACHE_LOG_DIR}/error.log
    CustomLog ${APACHE_LOG_DIR}/access.log combined
</VirtualHost>
Apache calls this name-based virtual hosting, which allows you to serve multiple virtual hosts on a single IP address. IP-based hosting requires that each virtual host have its own IP address. Now you must activate the new configuration with a2ensite:
$ sudo a2ensite test.com.conf
Enabling site test.com.
To activate the new configuration, you need to run:
  service apache2 reload
Restart Apache, then point your web browser to http://test.com (Figure 3).

/etc/hosts file:
127.0.1.2       test.com
127.0.1.3       www.test.com
These are localhost addresses, so your sites are not accessible outside of your PC. For more LAN testing you could use the /etc/hosts file on multiple computers in the same subnet, and enter the LAN IP address of your Apache server instead of a localhost address. Another option is to use Dnsmasq; creating a LAN server is easy with Dnsmasq, so check out Dnsmasq For Easy LAN Name Services to learn how.
If you want a publicly-accessible web server over the big bad Internets, then you have a whole lot more work to do with registering domain names, setting up proper DNS, and building a good firewall. Do please study this intensively, and be careful!
Setting up More Sites
Want to set up more sites? Just repeat these steps, creating different document roots and domains.
The fine Apache documentation is exhaustively thorough, and it makes more sense when you have a live server running, and have some idea of how things work. Come back for part 2 to learn about the vitally-important SSL configuration, and how to bend .htaccess to your will.
Read Part 2 in this series for more on how to enable SSL on Apache.
Advance your career in Linux System Administration. Check out the Essentials of System Administration course from The Linux Foundation.


